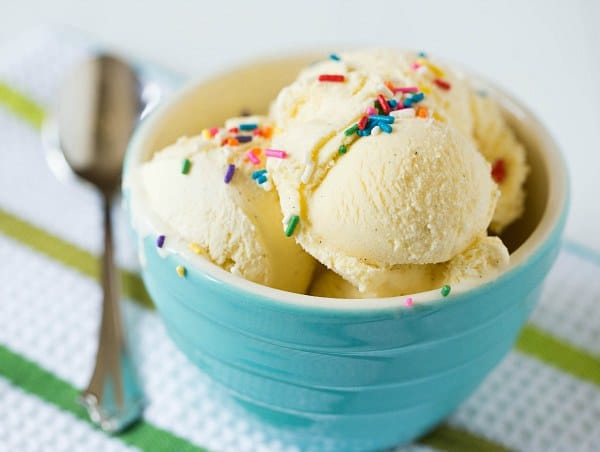
Vanilla Ice Cream: Healthier, Tastier, and Cost-Effective
Classic homemade vanilla ice cream requires simple, easily accessible ingredients. You’ll need heavy cream, whole milk, granulated sugar, egg yolks, and vanilla extract. Heavy cream contributes to the ice cream’s richness. Whole milk balances the cream’s heaviness, making the final product creamy but not overly dense. Granulated sugar sweetens and enhances the vanilla flavor. Egg yolks act as a natural emulsifier, creating a smooth texture. Vanilla extract provides the distinct, rich flavor essential to this ice cream.
The Importance of Vanilla
Vanilla is the cornerstone of this ice cream. Using high-quality vanilla extract makes a significant difference. Pure vanilla extract, made from vanilla beans, offers a deep, complex flavor. Avoid artificial vanilla extracts because they lack the depth and richness of pure vanilla. If possible, use vanilla beans or vanilla bean paste for an even more intense flavor. Simply split the bean and scrape out the seeds to infuse the cream mixture. This attention to detail elevates the ice cream’s overall taste, creating an authentic and unforgettable dessert.
Making Your Own Vanillace Cream
Step-by-Step Process
To make your own vanillace cream, follow these steps:
- Prepare Ingredients: Gather 2 cups heavy cream, 1 cup whole milk, 3/4 cup granulated sugar, 5 large egg yolks, and high-quality vanilla extract.
- Heat the Milk and Cream: In a medium saucepan, combine the heavy cream and whole milk. Heat over medium heat until it begins to simmer, but do not let it boil.
- Whisk Sugar and Egg Yolks: In a bowl, whisk together the granulated sugar and egg yolks until the mixture is light and fluffy.
- Temper the Egg Mixture: Slowly pour the hot milk mixture into the egg yolk mixture, whisking constantly to prevent the eggs from curdling.
- Cook the Custard: Return the mixture to the saucepan and cook over low heat, stirring constantly until it thickens enough to coat the back of a spoon.
- Add Vanilla Extract: Remove from heat, add 1 tablespoon of vanilla extract or the seeds from one vanilla bean, and mix well.
- Chill the Custard: Pour the custard into a clean bowl and cover with plastic wrap, letting it chill in the refrigerator for at least 4 hours or overnight.
- Churn the Ice Cream: Pour the chilled custard into an ice cream maker and churn according to the manufacturer’s instructions until it reaches a soft-serve consistency.
- Freeze the Ice Cream: Transfer the churned ice cream to a lidded container and freeze for at least 2 hours before serving.
- Use Cold Ingredients: Ensure that all ingredients, especially heavy cream and milk, are cold before starting to improve the texture.
- Keep the Custard Cold: Always refrigerate the custard mixture thoroughly before churning to prevent ice crystals.
- Avoid Overmixing: When churning, follow the ice cream maker’s instructions closely to avoid overmixing, which can lead to a grainy texture.
- Freeze Rapidly: After churning, freeze the ice cream quickly to maintain smoothness. Use a pre-chilled container to expedite the process.
- Storage Tips: Store ice cream in a shallow, flat container to freeze more uniformly. Cover the surface with plastic wrap before sealing to prevent ice crystals.
Benefits of Homemade Cream
Healthier Ingredients
Choosing to make homemade vanilla ice cream allows you to control the ingredients. Commercial ice cream often contains additives, artificial flavors, and preservatives. In contrast, using fresh, high-quality ingredients like heavy cream, whole milk, sugar, and vanilla extract ensures a cleaner, purer product. You can opt for organic dairy, use less sugar, or choose alternative sweeteners to align with dietary restrictions.
Personalization and Flavor
Homemade ice cream provides limitless opportunities for customization. You can adjust the sweetness, richness, or even add mix-ins like fresh fruit, nuts, or chocolate chips. Creating unique flavor combinations, such as lavender-vanilla or caramel swirl, offers a personalized touch that commercial options can’t match. This flexibility allows for experimentation and guarantees satisfaction tailored to your taste preferences.
Comparing Homemade and Store-Bought Vanilla Cream
Cost Effectiveness
Homemade vanilla cream offers a cost-effective solution. By purchasing basic ingredients like milk, sugar, and vanilla extract, you reduce expenses compared to premium store-bought brands. While initial investment in equipment like an ice cream maker may be higher, it pays off with frequent use. Bulk buying ingredients also helps lower costs. In contrast, store-bought options often include markups for packaging and branding.
Flavor and Quality Differences
Homemade vanilla cream excels in flavor and quality. You control the ingredients, ensuring a rich, authentic taste. There are no artificial flavors or preservatives, unlike many commercial products. Freshly made vanilla cream also boasts a creamier texture, since you avoid stabilizers used in store-bought varieties. Customized flavor profiles are achievable, offering endless creation possibilities beyond standard commercial offerings.
Conclusion
Making your own vanilla ice cream at home isn’t just simple; it offers a rewarding experience that enhances both flavor and quality. You’ll enjoy the freedom to customize each batch to your taste, ensuring a healthier and more delicious dessert. Plus, you’ll save money in the long run by using basic ingredients and equipment. Dive into the world of homemade vanilla ice cream and discover a treat that’s truly tailored to your preferences.