Gluten-Free Bread in a Bread Machine: Tips, Flour Choices, and Best Practices
Homemade gluten-free bread in a bread machine offers numerous benefits. Control over ingredients ensures a safer, healthier loaf. By choosing high-quality flours and additives, you can avoid fillers and preservatives often found in store-bought options. Experimentation with ingredients like almond flour, coconut flour, and quinoa leads to enhanced flavor and texture.
Cost savings is another advantage. Buying specialty gluten-free breads from stores can be expensive, but making it at home reduces costs substantially. Additionally, bread machines provide convenience. Programs and settings for gluten-free bread ensure the dough is mixed and baked correctly, yielding a consistent result every time.
Freshness is also guaranteed. Unlike commercial bread that might be days old, homemade bread can be enjoyed straight from the bread machine, offering a superior taste experience.
Challenges of Making Gluten-Free Bread
Despite the benefits, several challenges exist when making gluten-free bread in a bread machine. Texture and consistency of the dough often pose issues since gluten-free flours lack the elasticity gluten provides. This may result in a denser loaf compared to traditional bread.
Finding the right mix of flours and ingredients is crucial but can be tricky. Different blends like rice flour, tapioca starch, and sorghum flour impact the final product’s taste and rise. It often requires a lot of trial and error to achieve the desired outcome.
Another challenge is the potential for cross-contamination. Careful cleaning of the bread machine before use ensures it’s safe for gluten-free baking. Additionally, precise measurements and following recipes closely are critical since small deviations can produce suboptimal results.
Understanding these challenges helps in preparing for a more successful gluten-free bread-making experience in a bread machine.
Choosing the Right Ingredients for Gluten-Free Bread
Gluten-Free Flours and Their Properties
Selecting the right gluten-free flours is crucial. Various options offer unique characteristics that impact flavor and texture:
- Rice Flour: Delivers a mild flavor, ideal for smooth textures.
- Almond Flour: Adds a nutty taste, enhancing flavor while providing moisture.
- Coconut Flour: Offers a subtle sweetness, absorbing more liquid, which can affect dough consistency.
- Sorghum Flour: Provides a mild, wheat-like taste, often used in combination with other flours.
- Tapioca Flour: Contributes chewiness and lightness, useful in achieving elasticity.
Incorporating a balance of these flours can result in a well-rounded bread, mimicking the properties of traditional wheat-based products.
Importance of Binders in Gluten-Free Baking
Binders play an essential role in gluten-free baking. They compensate for the absence of gluten, ensuring bread achieves the desired structure and texture:
- Xanthan Gum: Adds elasticity and viscosity, improving dough’s binding properties.
- Guar Gum: Enhances dough strength and cohesion, suitable for achieving a better rise.
- Psyllium Husk: Absorbs water, creating a gel-like consistency that holds the bread together.
- Chia Seeds: When mixed with water, form a gel that provides structure and moisture to the dough.
- Flaxseeds: Function as an egg substitute, adding viscosity and binding capabilities.
Utilizing these binders ensures your gluten-free bread maintains its shape and doesn’t crumble, resulting in a product comparable to gluten-containing bread.
Best Bread Machines for Gluten-Free Bread
Features to Look for in a Bread Machine
When choosing a bread machine for gluten-free bread, prioritize specific features. Look for:
- Dedicated Gluten-Free Setting: Machines with a gluten-free setting adjust kneading and baking times to accommodate gluten-free dough consistency.
- Customizable Settings: Custom settings offer control over kneading, rising, and baking times, essential for experimenting with gluten-free recipes.
- Multiple Loaf Sizes: Options for different loaf sizes provide flexibility, especially if you want to make smaller or larger batches.
- Delay Timer: A delay timer lets you set the machine to start at a specific time, ensuring fresh bread when needed.
- Sturdy Mixing Paddle: A robust mixing paddle is crucial for properly mixing denser gluten-free dough.
- Non-Stick Bread Pan: Non-stick pans facilitate easy bread removal and simplify cleanup.
- Power Backup: Machines with power backup features resume the baking process after brief power outages, ensuring consistent outcomes.
Top Recommended Bread Machines
Selecting the right bread machine improves your gluten-free bread-making experience. Here are top recommendations:
| Brand & Model | Key Features |
|---|---|
| Zojirushi Home Bakery Virtuoso Plus | Dual kneading blades, gluten-free setting, rapid courses |
| Breville Custom Loaf | Customizable settings, collapsible kneading paddle, large LCD display |
| Hamilton Beach Bread Maker | Affordable, gluten-free course, 12 pre-programmed settings |
| Cuisinart Bread Maker | Compact size, gluten-free setting, 3 crust shades, 12 settings |
| Oster Expressbake | Budget-friendly, express baking, gluten-free setting, multiple loaf sizes |
- Zojirushi Home Bakery Virtuoso Plus: Offers dual kneading blades and a specific gluten-free setting. Known for even cooking and reliability.
- Breville Custom Loaf: Features custom settings and a collapsible kneading paddle, reducing holes in the finished loaf.
- Hamilton Beach Bread Maker: Budget-friendly option with 12 pre-programmed settings, including a gluten-free course.
- Cuisinart Bread Maker: Compact and efficient, with 12 settings and an adjustable crust shade option.
- Oster Expressbake: Notable for its express baking feature, enabling quicker bread preparation.
Choose a machine that aligns with your preferences to ensure the best gluten-free baking results.
Step-by-Step Guide to Making Gluten-Free Bread
Preparing Your Ingredients
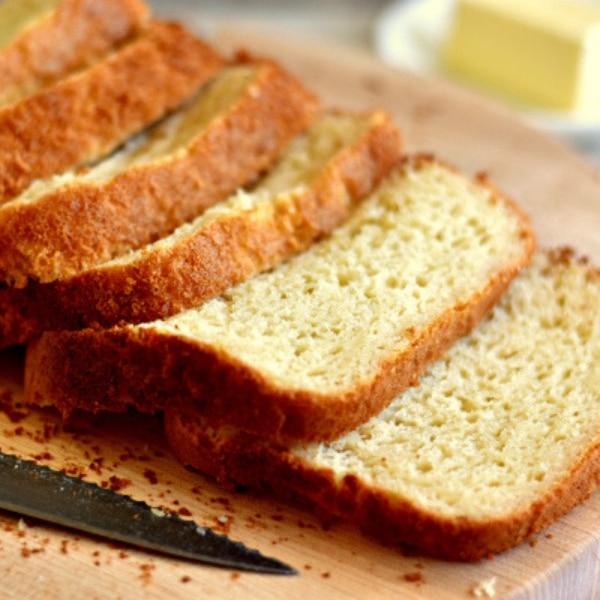
Gather all necessary ingredients before starting the gluten-free breadmaking process. Use gluten-free flours like rice flour, almond flour, and tapioca starch. Include binders such as xanthan gum or guar gum to improve texture. Measure ingredients precisely, using a kitchen scale for accuracy. Ensure all tools and surfaces are free from gluten contamination.
Settings and Tips for Bread Machines
Choose a bread machine with a dedicated gluten-free setting. If unavailable, use the programmable settings to customize the dough cycle and baking time. Keep the dough consistency slightly wetter than regular bread dough for better results. Monitor the dough during the mixing phase to ensure proper consistency. After baking, let the bread cool completely before slicing to avoid crumbling.
Ensure you fully understand your bread machine’s manual, as different models may have specific requirements for gluten-free baking.
Conclusion
Mastering gluten-free bread with a bread machine is both rewarding and practical. By controlling your ingredients and understanding the nuances of gluten-free baking, you can enjoy fresh, delicious bread tailored to your dietary needs. Remember to select the right flours and binders, and always monitor your bread machine’s settings for the best results. With a bit of practice and patience, your homemade gluten-free bread will become a staple in your kitchen.