Jell-O Poke Cake Recipe with Flavor Variations and Tips
Jell-O Poke Cake originated in the mid-20th century. Housewives embraced it due to its simplicity and colorful presentation. The cake became a hit at family gatherings and potlucks in the United States. Advertisements in women’s magazines and TV shows boosted its popularity, promoting Jell-O products as fun and convenient. The cake’s appeal also lay in its ability to use everyday ingredients, making it accessible to everyone.
Evolution of the Recipe
Over the decades, the Jell-O Poke Cake recipe has evolved. Initially, it featured basic white or yellow cake combined with one Jell-O flavor. Now, variations include using different cake bases like chocolate or strawberry and mixing multiple Jell-O flavors for a more vibrant dessert. Bakers have also added toppings like whipped cream and fruit to enhance flavor and visual appeal. These modifications maintained the cake’s relevance across generations, ensuring it remains a beloved dessert option.
How to Make a Jell O Poke Cake
Ingredients Needed
To make a Jell-O Poke Cake, you’ll need:
- 1 box of white or yellow cake mix
- 3 eggs
- 1 cup of water
- 1/3 cup of vegetable oil
- 1 package (3 oz) of Jell-O gelatin (any flavor)
- 1 cup of boiling water
- 1/2 cup of cold water
- 1 container (8 oz) of whipped topping
- Prepare the Cake:
Preheat your oven to 350°F (175°C). Follow the instructions on the cake mix box to combine the cake mix, eggs, water, and vegetable oil. Pour the mix into a greased 9×13-inch pan. - Bake the Cake:
Place the pan in the preheated oven. Bake for 25-30 minutes or until a toothpick inserted in the center comes out clean. Once baked, remove the cake from the oven and let it cool for at least 20 minutes. - Poke the Cake:
Using the handle of a wooden spoon, poke holes evenly across the entire surface of the cake. Ensure the holes reach the bottom of the cake for even Jell-O distribution. - Prepare the Jell-O:
Dissolve the Jell-O powder in 1 cup of boiling water by stirring until fully dissolved. Add 1/2 cup of cold water to the mixture and continue stirring until combined. - Pour the Jell-O:
Carefully pour the prepared Jell-O mixture over the cake, ensuring it seeps into the holes. Refrigerate the cake for at least 3 hours or until the Jell-O sets. - Add the Topping:
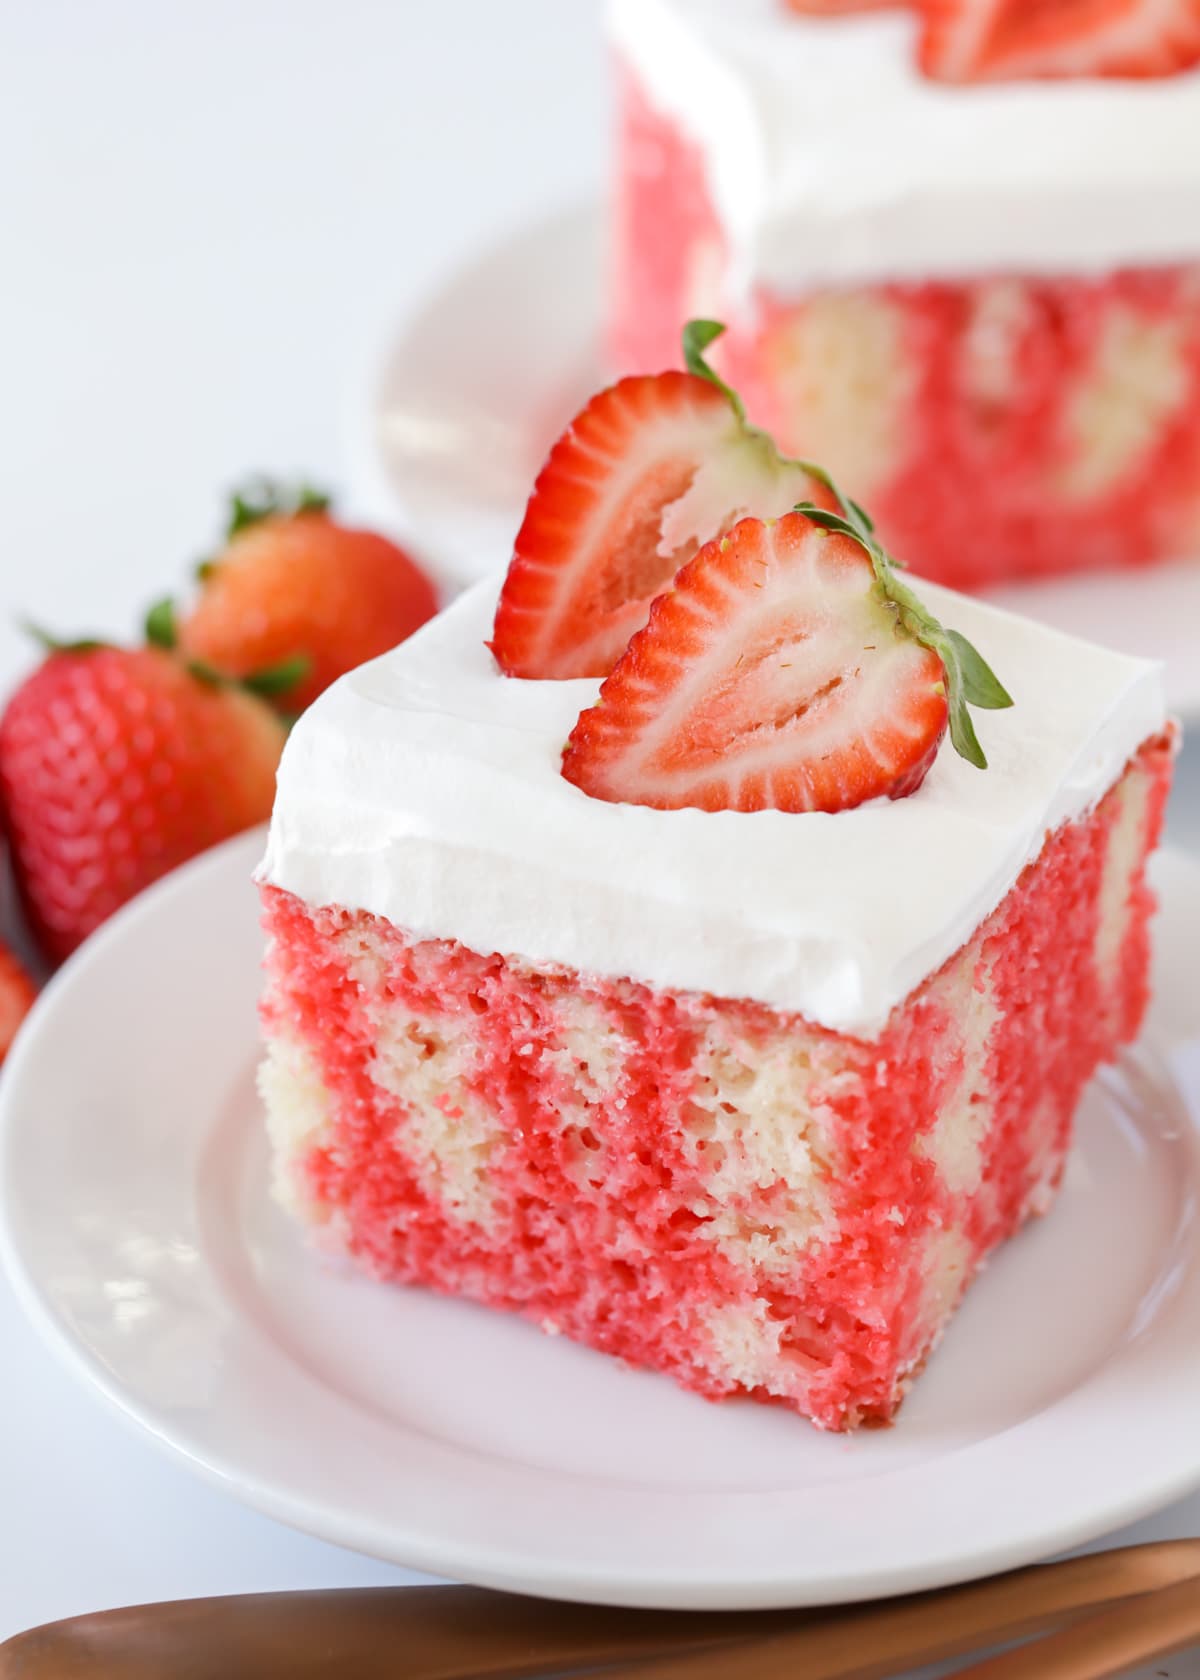
Spread the whipped topping evenly over the chilled cake. You can get creative by adding fruits like strawberries or crushed pineapple on top of the whipped topping for added flavor and decoration.
Flavor Variations and Ideas
Classic Combinations
Explore traditional pairings that have stood the test of time. Lemon cake with strawberry Jell-O adds a tart and sweet contrast. Chocolate cake with raspberry Jell-O provides a rich and fruity combination. Vanilla cake with orange Jell-O creates a creamy and citrusy flavor. These flavors are popular due to their balanced taste profiles and broad appeal.
Creative Twists
Venture into innovative and exciting flavor combinations for more adventurous palates. Try red velvet cake with cherry Jell-O to enhance the deep, cocoa taste with a touch of fruitiness. Opt for coconut cake with lime Jell-O to infuse a tropical essence. Carrot cake with pineapple Jell-O introduces a refreshing and unique combination. These twists bring new dimensions to the classic dessert, allowing for endless customization.
Tips for the Perfect Jell O Poke Cake
Baking the Perfect Base
Use a moist cake mix to create a soft texture. Follow the package instructions, ensuring you bake it to the correct time and temperature. A well-cooked cake creates an ideal foundation for absorbing the Jell-O. After baking, let the cake cool in the pan to prevent crumbling.
Achieving Optimal Jell O Absorption
Poke holes in the cooled cake using a fork or the end of a wooden spoon. Space the holes evenly to ensure consistent absorption. Prepare the Jell-O mixture according to the packet, then pour it slowly over the cake, allowing it to seep into each hole. Refrigerate the cake for at least 2 hours to enable full absorption and achieve a moist, flavorful dessert.
Serving and Presentation Tips
Decorative Ideas
Enhance your Jell-O Poke Cake by adding decorative elements. Sprinkles, fresh fruits, and edible flowers jazz up its appearance. Use different Jell-O colors to create interesting patterns on the cake’s surface. Add a layer of whipped cream or frosting and top it with theme-specific decorations like chocolate curls for a chocolate Jell-O Poke Cake. Create multicolored layers by using various Jell-O flavors in separate sections of the cake.
Serving Suggestions
Serve Jell-O Poke Cake chilled for the best flavor and texture. Cut the cake into uniform squares for easy serving. Use a sharp knife for clean slices, especially with layered or intricately decorated cakes. Pair the cake with side accompaniments such as fresh fruit slices, ice cream, or a dollop of whipped cream. Serve on colorful plates or themed dishware to match your event’s decor. For individual servings, use clear cups to showcase the cake’s vibrant layers.
Conclusion
Creating a Jell-O Poke Cake is a delightful way to bring a splash of color and flavor to your dessert table. With endless flavor combinations and creative twists, you can tailor it to suit any occasion or personal preference. Whether you opt for a classic combination or experiment with new flavors, this cake is sure to impress your guests.
Remember to pay attention to the details like achieving a moist cake base and optimal Jell-O absorption. These steps ensure a delicious and visually appealing dessert. Don’t forget to get creative with your toppings and presentation to make your Jell-O Poke Cake truly stand out.
By following the tips and suggestions in this guide, you’ll be well on your way to mastering this timeless dessert. Enjoy the process and savor the sweet results!