Plum Jelly at Home: Recipes, Tips, and Health Benefits
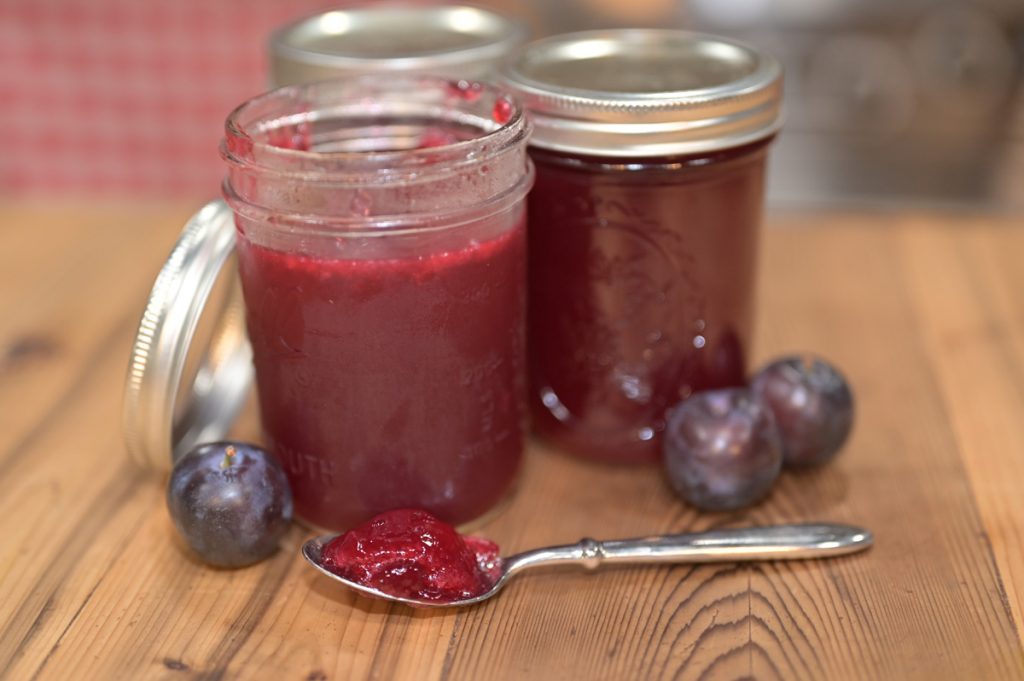
Plum jelly is a sweet, translucent spread made by combining plum juice with sugar and pectin. This preserve captures the essence of fresh plums, providing a clear and smooth texture. To make it, press and strain cooked plums to extract the juice, then boil with sugar and pectin until it reaches the right consistency. Unlike other spreads, it contains no fruit pieces, offering a uniform flavor.
Differentiating Plum Jelly from Jam and Preserves
Plum jelly differs from jam and preserves in texture and composition. Jelly uses only the juice of the fruit, ensuring a smooth consistency. Jam includes crushed or pureed fruit, leading to a thicker, more textured spread. Preserves contain chunks of fruit, often suspended in a syrup or jam base. Each provides a unique way to enjoy plums, but jelly’s crystal-clear appeal sets it apart.
Key Ingredients in Plum Jelly
Plums: Choosing the Right Variety
Selecting the right variety of plums is crucial for making plum jelly. European plums (e.g., Damson and Italian) offer a rich, deep flavor suitable for jelly. Japanese plums (e.g., Santa Rosa and Shiro) provide a sweeter, milder taste. Choosing ripe, but not overripe, plums ensures optimal pectin levels and natural sweetness.
Sweeteners Used in Plum Jelly
Sweeteners play a vital role in both flavor and texture. Granulated sugar is the most common sweetener, providing a classic sweetness that balances the tartness of the plums. Honey can be used to add a unique, floral note. Low-calorie options like stevia or agave syrup are available for those seeking a healthier alternative without compromising taste.
Health Benefits of Plum Jelly
Nutritional Content of Plums
Plums offer substantial nutritional value. They contain vitamins A, C, and K, which support immune function, skin health, and blood clotting. Plums are also rich in dietary fiber, aiding digestion and improving gut health. Moreover, they provide essential minerals like potassium, which helps regulate blood pressure.
Potential Health Benefits of Plum-Based Products
Plum-based products, including plum jelly, inherit the health benefits of plums. Consuming plum jelly can enhance antioxidant intake due to the presence of compounds like phenols and anthocyanins, which help reduce oxidative stress. The dietary fiber in plum jelly supports digestive health. Additionally, the natural sugars in plum jelly, balanced with the necessary vitamins and minerals, offer a healthier alternative to other sugary spreads.
How to Make Plum Jelly at Home
Necessary Equipment and Ingredients
To make plum jelly at home, gather essential items and fresh ingredients. Proper equipment ensures a smooth process, while quality ingredients guarantee great taste.
Equipment:
- Large pot: For boiling plums and other ingredients.
- Jelly strainer or cheesecloth: To strain the plum juice.
- Measuring cups and spoons: To measure ingredients precisely.
- Canning jars with lids: For storing the jelly.
- Tongs: To handle hot jars safely.
- Thermometer: To monitor the temperature (optional but useful).
Ingredients:
- Plums (4 lbs): Fresh and ripe for the best flavor.
- Sugar (4 cups): Balances the tartness of plums.
- Water (1 cup): Facilitates the cooking process.
- Lemon juice (1/4 cup): Adds acidity to help gel the jelly.
- Pectin (1 package): Ensures proper setting of the jelly.
Step-by-Step Guide to Making Plum Jelly
Follow these steps for a successful batch of homemade plum jelly:
- Prepare Plums:
- Wash and pit the plums.
- Cut them into small pieces.
- Cook Plums:
- Place plums and water into a large pot.
- Bring to a boil, then reduce heat and simmer for 15-20 minutes until plums are soft.
- Extract Juice:
- Use jelly strainer or cheesecloth to strain the plum mixture.
- Collect juice in a bowl, ensuring no solids remain.
- Combine Ingredients:
- Pour plum juice back into the pot.
- Add lemon juice and pectin, stirring to combine.
- Bring to a boil, stirring continuously.
- Add Sugar:
- Gradually add sugar, continuing to stir.
- Return to a boil and maintain a rolling boil for 1 minute, stirring constantly.
- Test Consistency:
- Use a thermometer (optional) to check the temperature (220°F).
- Perform a gel test by placing a spoonful of jelly on a cold plate; it should wrinkle when pushed.
- Jar the Jelly:
- Remove pot from heat and skim off any foam.
- Ladle jelly into sterilized canning jars, leaving 1/4-inch headspace.
- Wipe jar rims, apply lids, and tighten bands.
- Process Jars:
- Place jars in a boiling water bath for 5-10 minutes to ensure seal.
- Remove and cool jars on a towel-lined counter.
By following these steps, you create delicious, homemade plum jelly packed with flavor and nutrients. Enjoy it spread on toast, pastries, or as a glaze for meats.
Popular Plum Jelly Recipes
Classic Plum Jelly Recipe
A classic plum jelly recipe starts with fresh, ripe plums. You’ll need:
- 4 pounds plums, washed and pitted
- 7 cups sugar
- 1 box powdered pectin
- Water
- Prepare Plums: Cut plums into quarters. Place in a large pot and add enough water to cover the fruit.
- Cook and Mash: Bring the pot to a boil, then simmer for 20 minutes while mashing the plums.
- Extract Juice: Strain the mixture through a jelly bag or cheesecloth, collecting the juice.
- Combine Ingredients: Measure 5 cups of plum juice into a pot. Add powdered pectin and bring to a rapid boil.
- Add Sugar: Add sugar all at once, stirring constantly until it returns to a full boil. Boil hard for 1 minute.
- Test Consistency: Use a spoon to test if the jelly sheets off. If not, boil longer and retest.
- Jar and Process: Pour into sterilized jars, leaving 1/4-inch headspace. Seal and process in a boiling water bath for 5 minutes.
Spiced Plum Jelly Variations
For a spiced twist on your plum jelly, consider these variations:
Cinnamon-Plum Jelly:
- Add 2 teaspoons ground cinnamon.
Ginger-Plum Jelly:
- Add 1 tablespoon grated fresh ginger.
- Steep 2 whole star anise pods in the juice during the initial boil and remove before jarring.
- Prepare Spices: Add chosen spice(s) to the plum juice after straining.
- Combine Ingredients: Follow the same steps as the classic recipe, adjusting the amount of sugar and pectin as needed.
- Test and Jar: Test for the right consistency, then pour into sterilized jars. Process as per the classic recipe instructions.
These spiced variations add unique flavors to traditional plum jelly, enhancing its appeal.
Conclusion
Making homemade plum jelly is a rewarding experience that allows you to customize flavors to your liking. Whether you prefer the classic plum jelly or want to experiment with spiced variations like Cinnamon-Plum or Ginger-Plum Jelly, the possibilities are endless. Not only do you get to enjoy the delicious taste but you also benefit from the nutritional value of plums. So gather your ingredients and start your jelly-making journey today. Your taste buds will thank you.