Sushi Bake Recipe: Easy Steps, Variations & Serving Tips for an Authentic Experience
Sushi bake originated in the Filipino American community. It’s a relatively recent innovation that remixes traditional sushi by simplifying the preparation process. Created to make sushi accessible to home cooks, sushi bake gained popularity during the COVID-19 pandemic. With ingredients like rice, seafood, and vegetables, it’s layered into a casserole dish and baked until warm and creamy. The dish’s origin points to a fusion of convenience and culinary delight.
Traditional Sushi vs. Sushi Bake
Traditional sushi involves raw fish, vinegared rice, and various vegetables rolled in seaweed. This dish requires specialized skills to prepare correctly. Sushi bake, conversely, offers a more accessible approach. Instead of individual rolls, you layer the ingredients in a dish and bake them. This method doesn’t require raw fish; cooked seafood like crab or shrimp is often used. While traditional sushi focuses on precise presentation, sushi bake emphasizes flavor and ease of preparation.
Key Ingredients in Sushi Bake
Sushi Rice
Sushi rice serves as the base layer in your sushi bake. Use short-grain or medium-grain rice for its stickiness and ability to hold flavors. Season with rice vinegar, sugar, and salt to achieve the traditional sushi rice taste. Spread the cooked rice evenly in your baking dish, ensuring an even layer for a consistent foundation.
Seafood Choices
Seafood is a vital component in sushi bake, offering diverse options. Popular choices include crab sticks, shrimp, scallops, and imitation crab. Use imitation crab like kani for a budget-friendly yet flavorful option. If you prefer a richer taste, opt for shrimp or scallops. Cook the seafood first to enhance its flavor and texture before layering it over the sushi rice.
Creamy Components
Creamy elements elevate the richness of sushi bake. Use mayonnaise, cream cheese, or a combination for a velvety texture. Mix the mayonnaise with sriracha for a spicy kick, blending it with seafood for an even distribution. Cream cheese adds a tangy note, complementing the savory seafood and rice. Spread the creamy mixture over the seafood layer for a decadent finish before baking.
Preparing Your First Sushi Bake
Step-by-Step Guide
Begin by preheating your oven to 375°F. While the oven heats, cook 2 cups of sushi rice according to the package instructions. Once cooked, mix the rice with 1/4 cup of rice vinegar, 2 tablespoons of sugar, and 1 teaspoon of salt. Spread the seasoned rice evenly in a baking dish as the first layer.
For the second layer, mix 1 pound of imitation crab meat or cooked shrimp with 1/2 cup of mayonnaise and 4 ounces of softened cream cheese. Spread this seafood mixture over the rice layer.
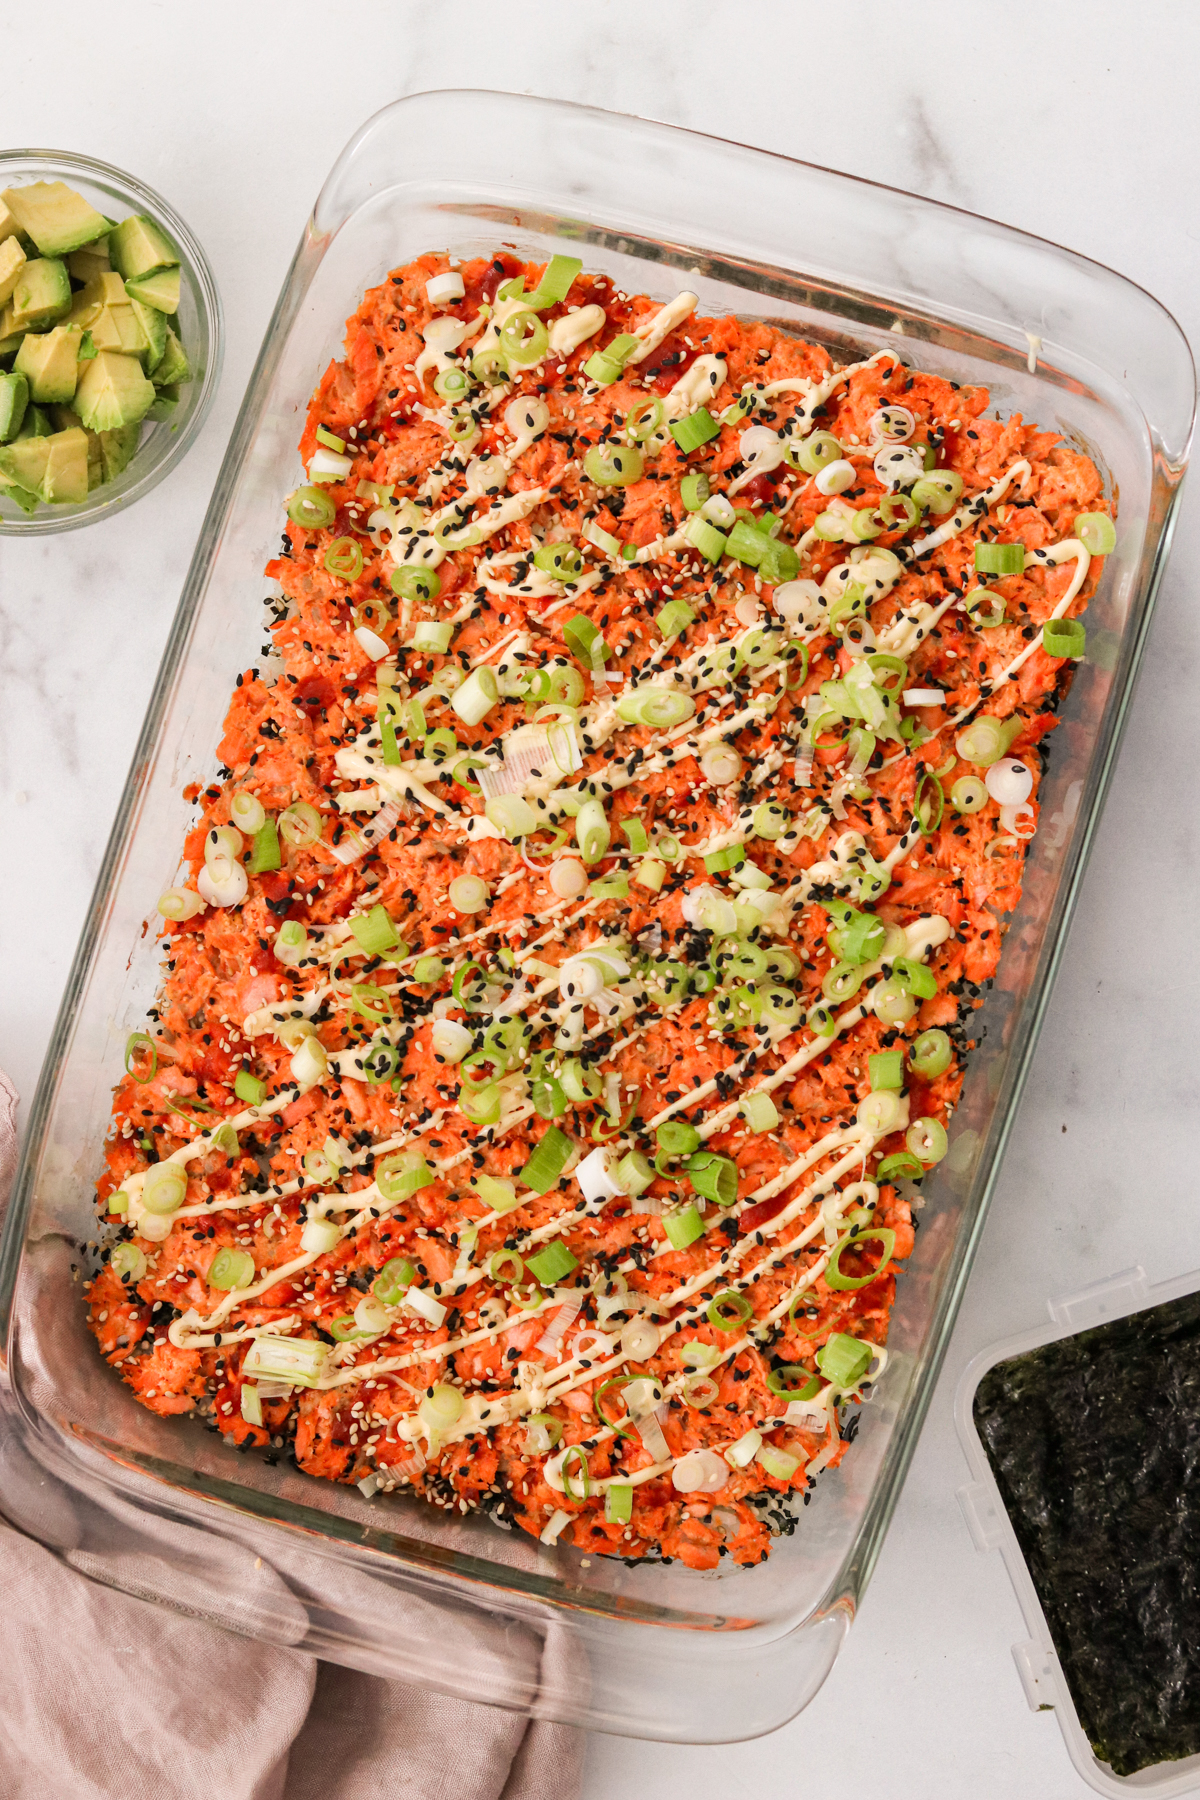
Top the seafood layer with a blend of sriracha and more mayonnaise for a spicy kick. Add sliced avocados and a garnish of furikake seasoning for extra flavor. Place the baking dish in the oven and bake for 15-20 minutes until the top is golden and bubbly.
After baking, serve the sushi bake with nori sheets and extra sesame seeds for garnish.
Tips for Perfect Layering
Spread the rice evenly to avoid clumps. This ensures each bite has a balanced texture. Use a spatula to press the rice firmly before adding the next layer.
Mix seafood and creamy components thoroughly. This guarantees a smooth, even layer without pockets of plain mayonnaise or cream cheese.
When adding the spicy mayo topping, use a piping bag or a plastic bag with a corner cut off. This allows for even distribution and better control over the quantity.
For extra flavor, sprinkle furikake seasoning between layers. This seasoning mix of dried fish, sesame seeds, and seaweed enhances each layer.
Allow the sushi bake to cool for a few minutes before serving. This makes it easier to cut and helps the layers set properly.
Popular Variations of Sushi Bake
Spicy Mayo Sushi Bake
Spicy Mayo Sushi Bake combines rich flavors with a slight heat, making it a favorite for those who enjoy a bit of spice. Prepare this by mixing cooked sushi rice with rice vinegar, then layer it evenly in a baking dish. Top the rice with a blend of crab sticks, shrimp, and spicy mayonnaise. To make the spicy mayo, mix mayonnaise with sriracha sauce to your desired heat level. Bake until the top is golden and slightly crispy. Garnish with sliced green onions, pickled ginger, and sesame seeds for added texture and flavor.
Vegan Sushi Bake
Vegan Sushi Bake offers a plant-based alternative without compromising flavor. Use seasoned sushi rice as the base layer in the baking dish. For the topping, opt for roasted vegetables like bell peppers, carrots, and mushrooms. Add a creamy layer of blended tofu mixed with vegan mayonnaise and nutritional yeast for a cheesy flavor. Bake until the vegetables are tender. Garnish with avocado slices, nori strips, and a drizzle of soy sauce. This version caters to vegan preferences while maintaining the essence of traditional sushi flavors.
Serving and Enjoying Sushi Bake
Best Accompaniments
Pairing accompaniments thoughtfully enhances your sushi bake experience. Offer roasted seaweed (nori) sheets for convenient bite-sized servings. Serve with pickled ginger and wasabi for added authentic flavor. To balance the richness, include fresh cucumber slices and carrot sticks. Soy sauce or a mix of soy sauce and vinegar provides a tangy contrast.
Storage Tips
Proper storage preserves the taste and texture of your sushi bake. Place leftovers in an airtight container, then store them in the refrigerator. Consume within 2-3 days for optimal freshness. Reheat in an oven at 350°F for about 10-15 minutes if you’d like to enjoy it warm again. Avoid microwaving, as it can alter the texture of the rice.
Conclusion
Sushi bake has become a beloved dish for its simplicity and versatility. Whether you’re a fan of the classic Spicy Mayo version or prefer a Vegan alternative, there’s a sushi bake recipe to suit your taste. Serve it with nori sheets, pickled ginger, and wasabi for an authentic touch. Remember to store any leftovers in an airtight container and reheat in the oven to maintain its deliciousness. Enjoy making and sharing this delightful dish with friends and family!