Phyllo or Filo Dough: A Step-by-Step Guide for Sweet and Savory Recipes
Phyllo or filo dough originated in the Middle East. The term “phyllo” comes from the Greek word meaning “leaf,” reflecting its paper-thin layers. This dough became a staple in Mediterranean and Middle Eastern cuisines. Culinary historians trace its use back to the Byzantine Empire, roughly between the 4th and 15th centuries. This dough spread to other regions, including Greece, Turkey, and the Balkans, where it became essential in preparing pastries like baklava and börek.
Difference Between Phyllo and Filo
Phyllo and filo refer to the same type of dough. Both terms describe thin sheets of unleavened dough used in various pastries. The difference in spelling comes from transliterations of the original word. “Phyllo” is the Greek-derived term, while “filo” reflects Turkish and Middle Eastern influences. Regardless of spelling, both terms denote the same dough, known for its delicate layers and crisp texture when baked.
Preparing to Make Homemade Phyllo or Filo Dough
Necessary Ingredients
Begin with gathering the essential ingredients to make phyllo dough. The primary components are simple yet crucial for achieving the desired delicate texture.
- Flour: Use 2 cups of all-purpose flour. This forms the base of your dough.
- Water: Measure 3/4 cup of lukewarm water. Ensuring the right temperature aids in forming a smooth dough.
- Olive Oil: Include 2 tablespoons of olive oil for elasticity and moisture.
- Vinegar: Add 1 tablespoon of white vinegar to help tenderize the dough.
- Salt: Use a pinch of salt to enhance the dough’s flavor.
Mix these ingredients in specific proportions to create the fine, pliable consistency required for phyllo dough.
Recommended Tools and Equipment
Equip your kitchen with specialized tools to ease the process of making phyllo dough.
- Mixing Bowl: A large bowl to combine and knead the ingredients properly.
- Rolling Pin: A sturdy rolling pin to achieve the thin layers characteristic of phyllo dough.
- Pastry Brush: To apply oil or butter between layers efficiently.
- Clean Cloth: A damp cloth to cover the dough, preventing it from drying out.
- Sharp Knife: For cutting the dough into desired shapes once rolled out.
- Measuring Cups and Spoons: Precise measurements ensure consistency and quality in the dough.
Having these tools on hand simplifies the dough preparation, allowing you to focus on mastering the phyllo dough technique.
Step-by-Step Guide to Making Phyllo or Filo Dough
Mixing the Ingredients
Combine all the ingredients. Measure 3 cups of all-purpose flour, 1 cup of water, 2 tablespoons of olive oil, 1 tablespoon of white vinegar, and 1/2 teaspoon of salt. Mix in a large bowl. Use a wooden spoon to blend until the dough starts to form. Continue kneading by hand on a lightly floured surface for about 10 minutes. Aim for a smooth, elastic dough. Cover with a damp cloth. Let rest for at least 1 hour to develop gluten.
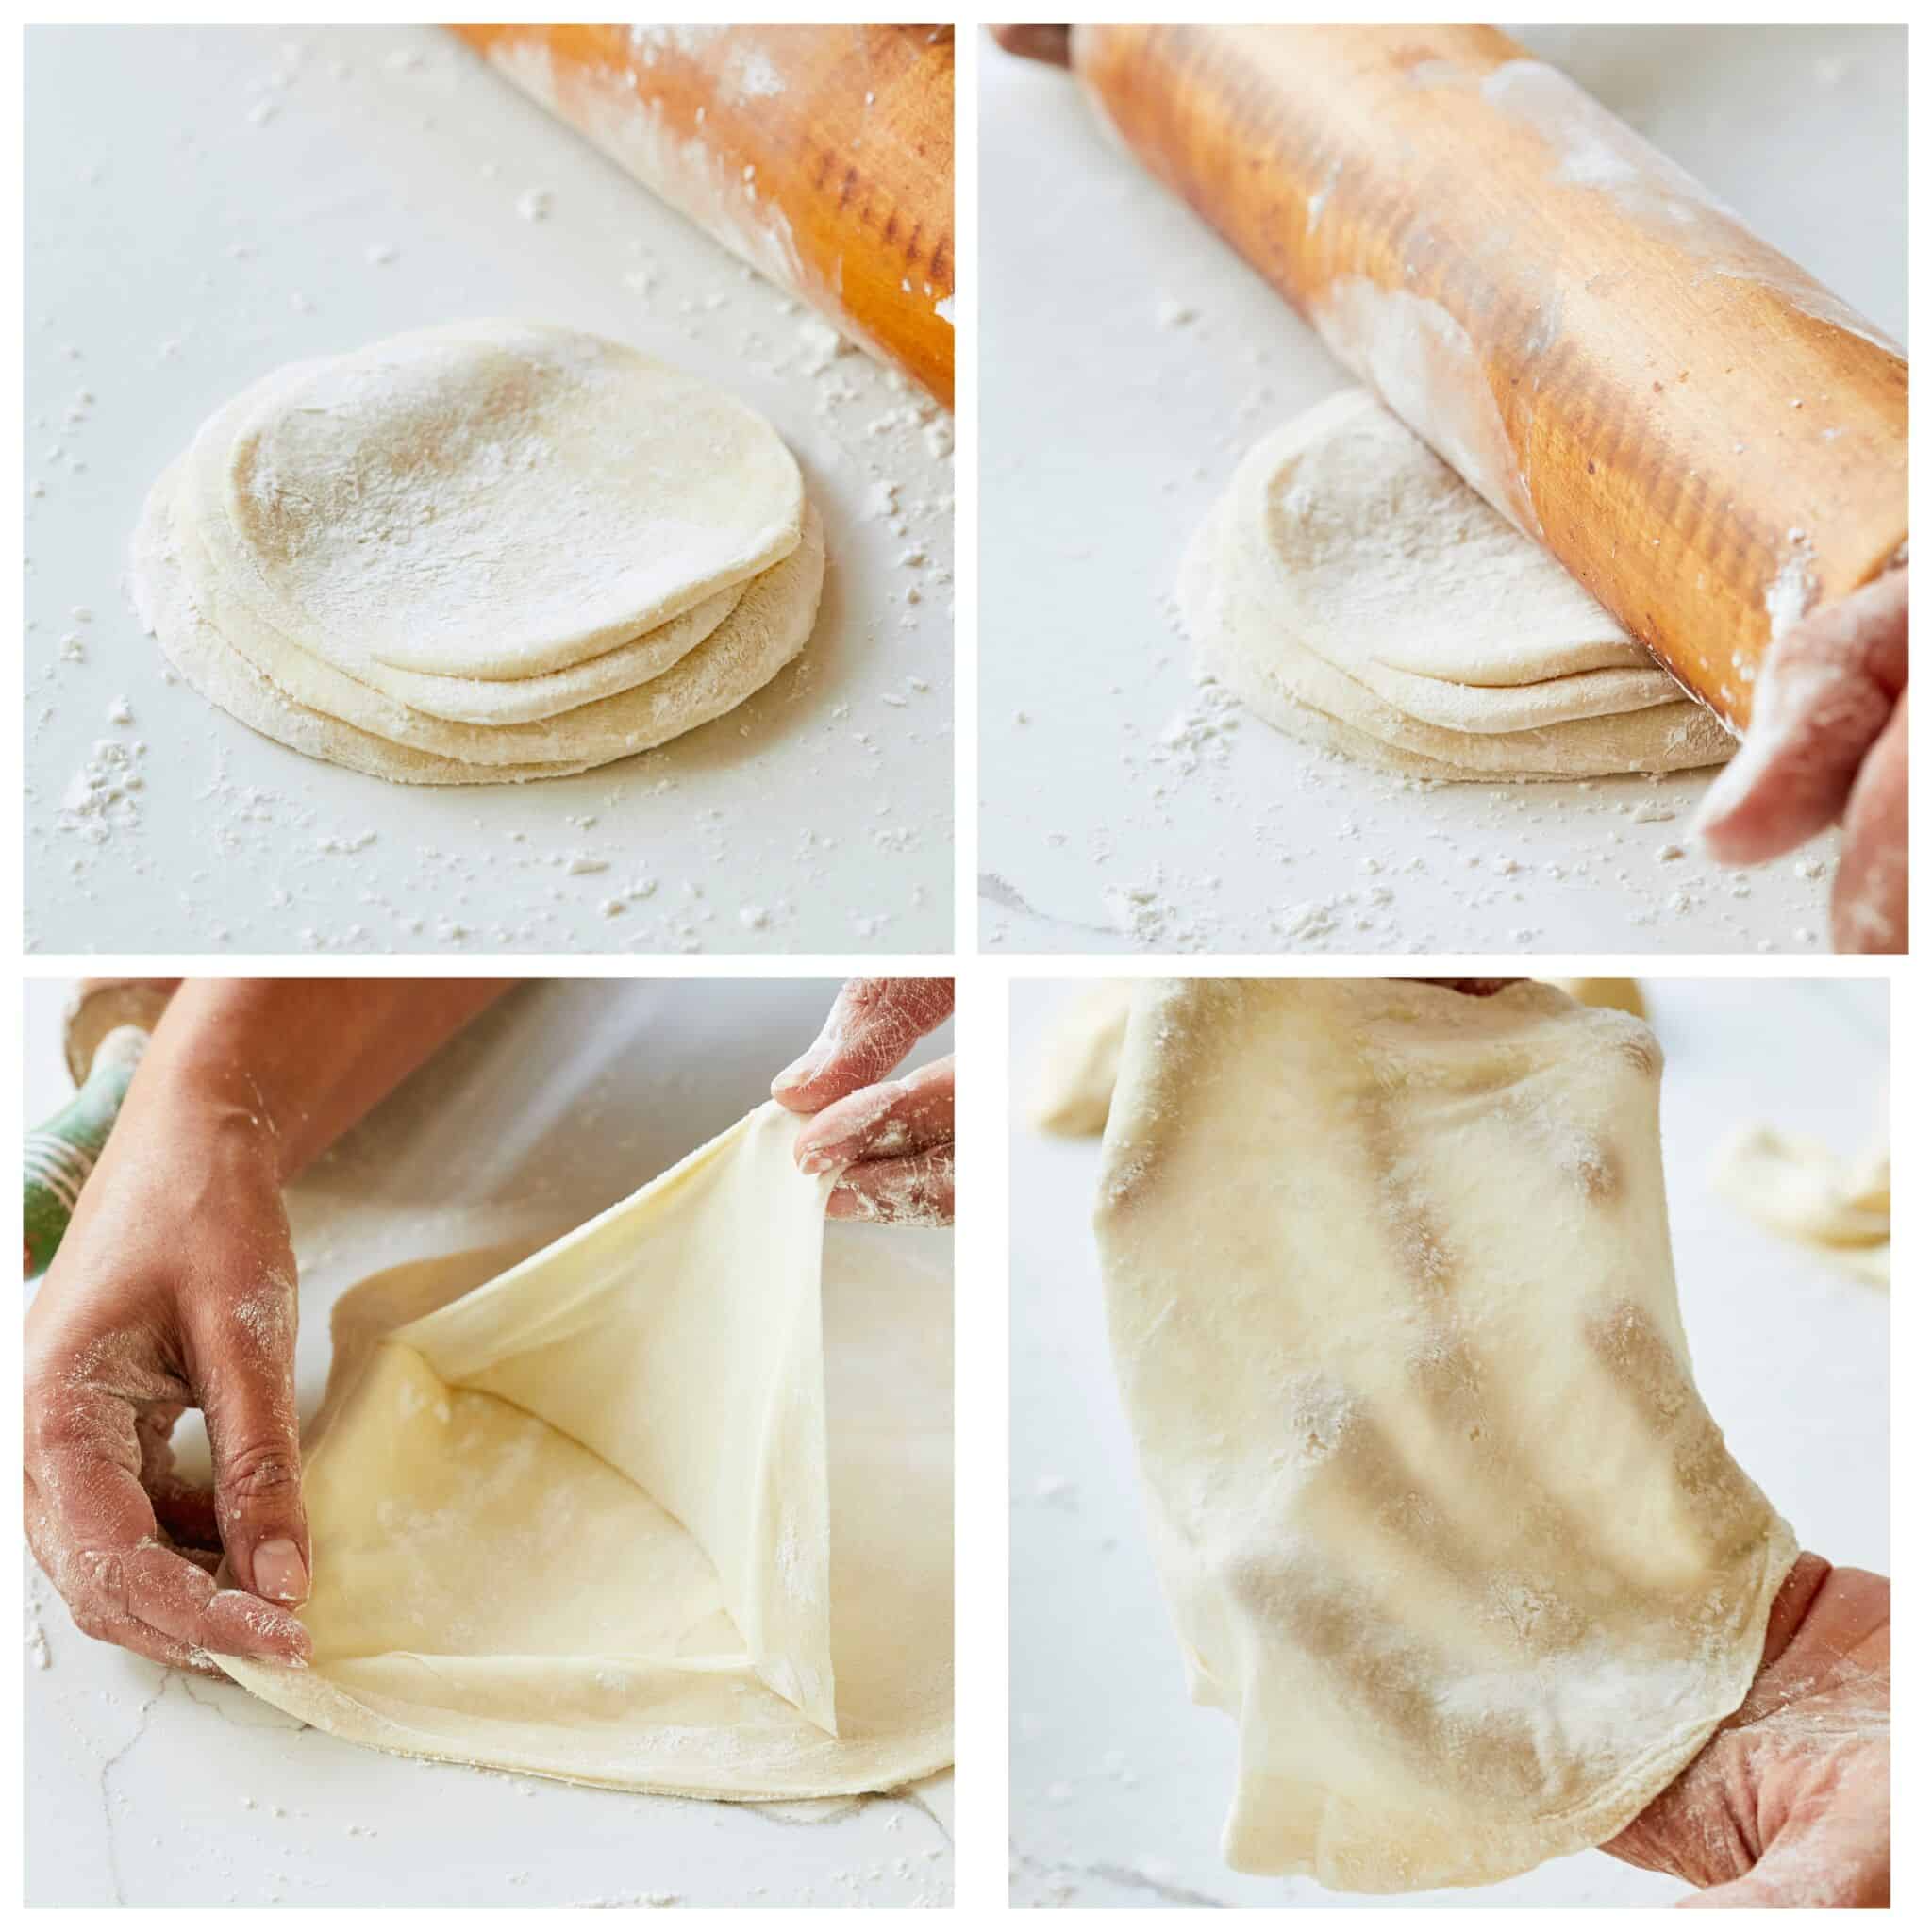
Rolling and Stretching the Dough
Divide the dough. Cut it into small, equal pieces (about 6-8). Roll each into a ball. Take one ball, flatten it slightly with your palm. Use a rolling pin to roll it into a thin circle. Dust with flour as needed. Flip and rotate frequently. Transfer the rolled dough onto a clean, floured cloth. Gently stretch it using your hands until it’s paper-thin. Repeat with remaining dough balls. Stack layers with parchment paper in between.
Tips for Achieving Ideal Thinness
Work in a cool, dry environment. Avoid humid conditions. Use plenty of flour to prevent sticking. Take your time with stretching. If tearing occurs, patch holes by overlapping dough. Keep the layers covered with a damp cloth to prevent drying out. Practice improves technique, so don’t be discouraged by initial difficulty.
Common Challenges and Solutions
Dealing with Tears or Holes
When tears or holes appear in your phyllo dough, patching them is essential. Use small scraps of extra dough, pressing them gently into place to cover the imperfections. Maintain an even pressure to avoid creating thinner areas that can tear again. Keeping the dough well-floured helps prevent sticking, reducing the likelihood of tears. If the dough dries out, you can spray it lightly with water and cover it with a damp cloth, restoring its flexibility.
Managing Dough Elasticity
Achieving the right elasticity in phyllo dough involves balancing moisture and kneading. Ensure you knead the dough thoroughly to develop gluten, which provides elasticity. Letting the dough rest for at least 30 minutes relaxes the gluten, making it easier to roll out. If the dough is too elastic and springs back, let it rest longer to allow further relaxation. Adjust the water content slightly if the dough feels too stiff or too soft, aiming for smooth, pliable dough that’s easy to stretch.
Uses for Homemade Phyllo or Filo Dough
Savory Recipes
Use homemade phyllo dough to create various savory dishes. Spanakopita is a popular Greek dish made by layering phyllo sheets with a filling of spinach, feta, and herbs. Baking this results in a crispy, flaky pastry with a rich, savory filling.
Consider making samosas, which are Indian pastries filled with spicy potatoes, peas, and sometimes meat. They are typically deep-fried, giving the phyllo an extra crispy texture.
You’ll also find phyllo dough invaluable when making savory pies like börek. This dish, originating from Turkey, often layers phyllo with fillings such as cheese, ground meat, or vegetables.
Sweet Recipes
Homemade phyllo dough excels in various sweet recipes. Baklava is a classic dessert that layers sheets of phyllo with a mixture of nuts, spices, and honey syrup. The dough’s flakiness complements the rich, sweet filling perfectly.
Use the dough to make a dessert called galaktoboureko. This Greek specialty layers phyllo around a creamy custard filling and gets drenched in a simple syrup, providing a delightful mix of textures and flavors.
Apple strudel features phyllo dough rolled around an apple, cinnamon, and sugar filling, then baked to golden perfection. The light, crispy phyllo contrasts beautifully with the sweet, tender apple filling.
Conclusion
Mastering homemade phyllo or filo dough opens up a world of culinary possibilities. Whether you’re crafting savory Spanakopita or indulging in sweet baklava, your creations will benefit from the unique texture and flavor of fresh dough. Embrace the process, and you’ll find that the effort pays off in the quality of your dishes. With practice, you’ll overcome common challenges and enjoy the versatility this dough brings to your kitchen. So roll up your sleeves and start experimenting with your own homemade phyllo dough today.