Petits Fours: A Guide to Making and Enjoying Them
Petits fours originate from 18th-century France. The term “petits fours” translates to “small ovens,” reflecting the early baking method using the residual heat of brick ovens. These small pastries were historically served as part of elaborate banquets. The tradition of making petits fours spread across Europe, leading to the wide range of recipes seen today.
Types of Petits Fours
Petits fours come in several varieties, each offering a unique flavor and presentation.
- Petits Fours Secs: Dry and crispy, including cookies, puff pastries, and macarons. Examples are palmiers and meringues.
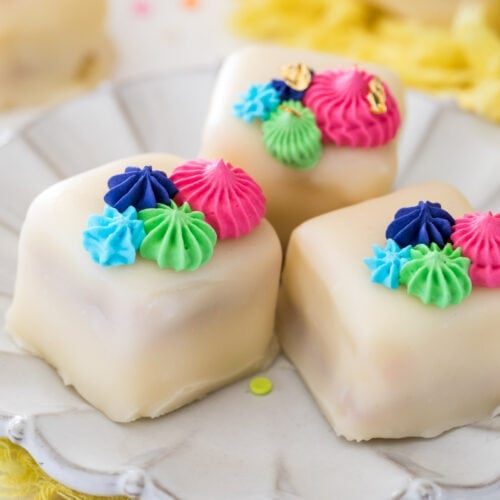
- Petits Fours Glacés: Iced or glazed, usually featuring a sponge cake base. Examples include petits fours with fondant icing and marzipan decorations.
- Petits Fours Frais: Fresh and perishable, often including fruit or cream. Examples are mini-tarts and éclairs.
Understanding these types allows you to appreciate the complexity and artistry behind petits fours.
Ingredients and Tools Needed
Common Ingredients
Petits fours require a variety of ingredients to achieve their signature flavors and textures. You might use:
- Flour: The base of many petits fours, offering structure and stability.
- Sugar: Adds sweetness and helps with browning.
- Butter: Provides richness and a tender crumb.
- Eggs: Bind ingredients, add moisture and contribute to texture.
- Almond Paste: A staple in many petits fours, giving a distinct flavor.
- Chocolate: White, milk, or dark chocolate can be incorporated for coating or filling.
- Jam or Preserves: Used as a filling for added sweetness and fruitiness.
- Fondant: For a smooth, glossy finish, often used in petits fours glacés.
Essential Baking Tools
To craft perfect petits fours, specific tools streamline the process and ensure consistent results. Your kitchen should include:
- Mixing Bowls: For combining ingredients efficiently.
- Electric Mixer: Speeds up mixing and ensures thorough blending.
- Baking Sheets: Essential for baking and cooling petits fours.
- Cooling Racks: Prevents overbaking by allowing air circulation.
- Small Cutters: For cutting dough into uniform shapes.
- Piping Bags and Tips: Needed for detailed decorations or fillings.
- Offset Spatula: Useful for spreading fillings or coatings evenly.
- Silicone Baking Mats: Provides a non-stick surface for baking.
Each tool and ingredient plays a vital role in achieving the delicate balance required for petits fours.
Step-by-Step Guide to Making Petits Fours
Preparing the Batter
Start by gathering flour, sugar, butter, eggs, and almond paste. Use room-temperature butter for a smoother batter. Mix flour and sugar in a bowl. In another bowl, beat the butter until it’s fluffy. Slowly add eggs, one at a time, combining each egg fully before adding the next. Gradually add the flour mix and almond paste. Ensure the batter is smooth and free of lumps.
Assembling and Decorating
After baking, let the cake layers cool. Use a small cutter to create uniform shapes. For Petits Fours Glacés, coat each piece with a thin layer of jam. Then, pour fondant glaze over each piece, letting it harden. For additional decoration, use royal icing, piped details, or small edible beads. Create intricate patterns to showcase the elegance of petits fours.
Occasions for Petits Fours
Weddings and Showers
Petits fours add elegance to weddings and showers. Guests enjoy these delicate treats during dessert or as part of a dessert table. Their small size makes them perfect for sampling different flavors without overindulging.
Tea Parties and Gatherings
Petits fours are ideal for tea parties and gatherings. They pair well with tea and coffee, creating a sophisticated atmosphere. Guests appreciate the detailed designs and variety of flavors, which elevate the culinary experience.
Tips for Perfect Petits Fours
Achieving Smooth Icing
Ensure the fondant or glaze achieves the right consistency. Heat it gently to make it smooth and workable. Strain the icing through a fine mesh sieve before applying to avoid lumps. Pour the icing over the petits fours placed on a wire rack for even coverage. Use a spatula to remove excess icing, creating a sleek finish. If you’re adding decorations, do it quickly while the icing is still wet so they adhere properly.
Storage Tips
Keep petits fours fresh by storing them correctly. Place them in an airtight container to prevent drying out. Separate layers with parchment paper to avoid sticking. Store in the refrigerator if they contain perishable fillings or decorations. When ready to serve, let them come to room temperature for optimal taste and texture. Ensure you consume them within a few days for best results.
Conclusion
Petits fours embody a blend of history, skill, and elegance, making them a standout addition to any special occasion. By mastering the techniques and tips shared, you can create these delightful mini desserts that will impress your guests and elevate your culinary repertoire. Whether for weddings, showers, or tea parties, petits fours add a touch of sophistication and charm that’s hard to match. Embrace the art of petits fours and let their delicate beauty and exquisite taste transform your gatherings into unforgettable experiences.