Sugar Cookie Cutouts: History, Recipes, and Decorating Tips
Sugar cookie cutouts date back to the 1700s, originating in Europe, particularly in England and Germany. These cookies gained popularity due to their simple ingredients: sugar, flour, butter, eggs, and vanilla. They were initially associated with festive events like Christmas and weddings. Over time, many cultures incorporated these cookies into their celebrations, creating unique cutout shapes reflecting local customs.
Evolution Through the Ages
During the 18th and 19th centuries, sugar cookies evolved in the United States, especially in Pennsylvania with the influence of German settlers. The introduction of cookie cutters in various shapes expanded the range of designs, making the cookies more visually appealing. By the 20th century, sugar cookies became a staple in American households, especially during the holiday season. Advances in baking techniques and decorative tools further enhanced their appearance and taste, cementing their place in culinary traditions worldwide.
Essential Ingredients for Sugar Cookie Cutouts
Choosing the Right Flour
Using the right flour is crucial for making perfect sugar cookie cutouts. All-purpose flour works best because it creates a balanced texture that’s neither too soft nor too tough. A good rule of thumb is to measure flour accurately using a kitchen scale or spoon-and-level method. This ensures the dough isn’t too dense, which can affect the cookies’ shape and texture. For gluten-free options, substitute with a 1:1 gluten-free baking flour.
The Role of Sugar and Butter
Sugar and butter are essential for both flavor and texture in sugar cookies. Granulated sugar is usually the go-to choice as it provides the right amount of sweetness and helps achieve a crisp edge. Brown sugar, if used, adds a chewier texture and a caramel-like flavor.
Butter adds richness and helps bind the ingredients. For best results, use unsalted butter. It gives you control over the salt content, avoiding excessively salty cookies. Ensure the butter is at room temperature before mixing so it blends well, creating a smooth and cohesive dough.
Step-by-Step Baking Guide
Mixing the Dough
Use a large bowl to combine the ingredients for the dough. Begin by creaming 1 cup of unsalted butter and 1 cup of granulated sugar until the mixture is light and fluffy. Add 1 egg and 1 teaspoon of vanilla extract, mixing until well incorporated. In a separate bowl, whisk together 2 ¾ cups of all-purpose flour, ½ teaspoon of baking powder, and ¼ teaspoon of salt. Gradually add the dry ingredients to the butter mixture, mixing at low speed until the dough forms. If the dough is too sticky, you can add a tablespoon of flour. Refrigerate the dough for at least 1 hour, as this makes it easier to roll and cut.
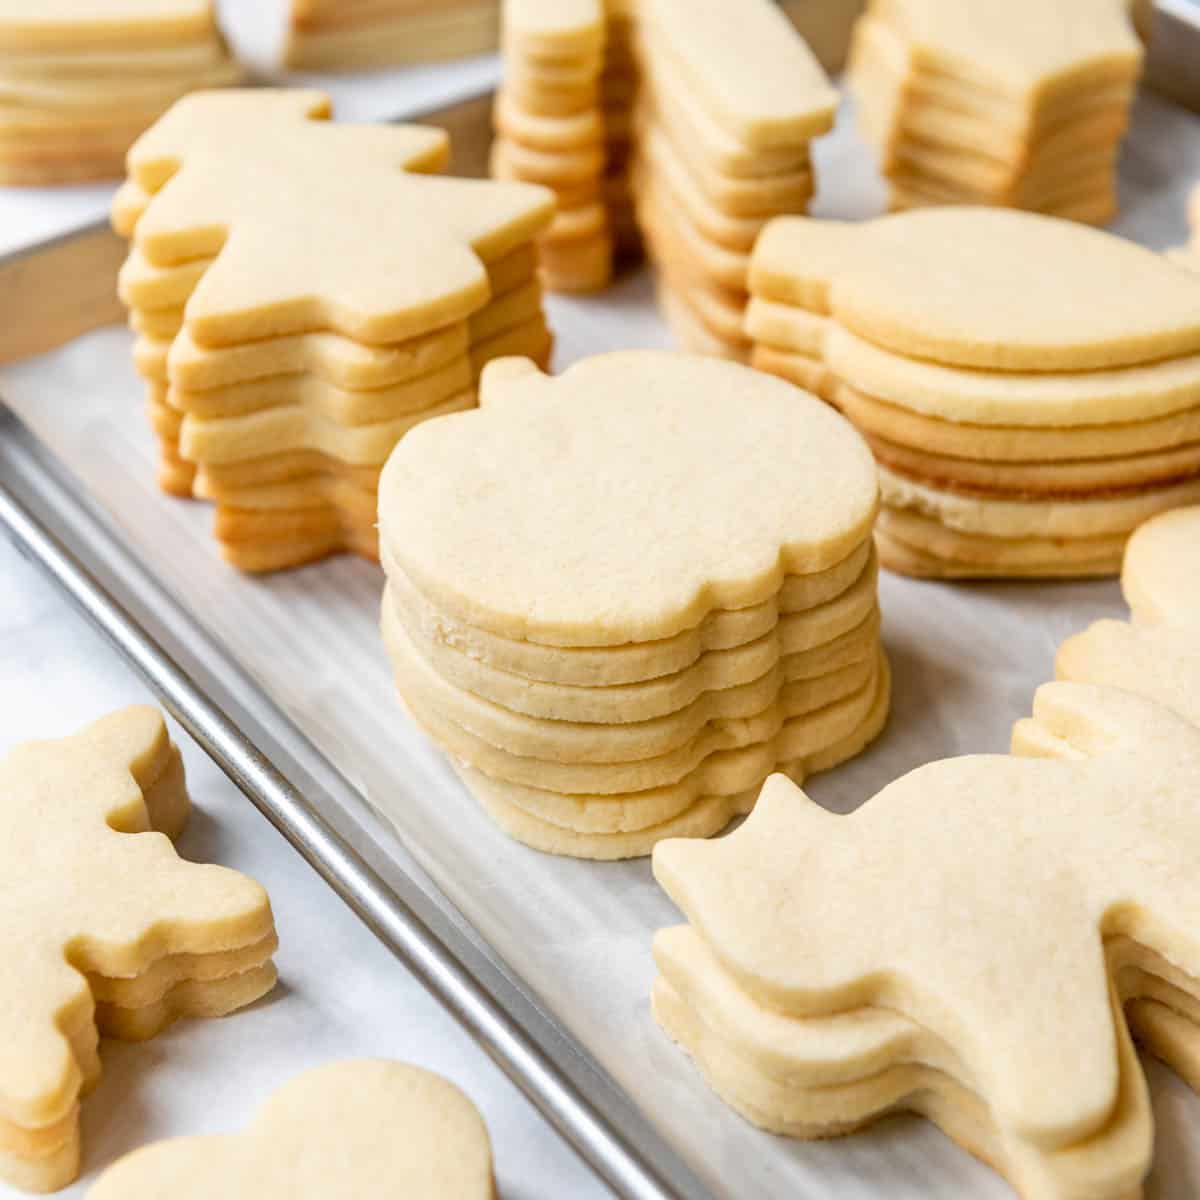
Cutting and Shaping
Preheat your oven to 350°F (175°C) while the dough is chilling. Lightly flour your work surface to prevent sticking, then roll out the dough to about ¼ inch thickness. Use cookie cutters to create your desired shapes. Dip the cutters in flour before each use to ensure clean edges. Transfer the cutouts to a parchment-lined baking sheet, spacing them 1 inch apart. If the dough becomes too soft, chill the cutouts in the refrigerator for 10-15 minutes before baking.
Baking Techniques
Ensure even baking by adjusting racks to the center of the oven. Place the baking sheet with cutouts in the preheated oven. Bake for 8-10 minutes or until the edges are light golden brown. Avoid overbaking to keep the cookies soft and tender. Let the cookies cool on the baking sheet for 2-3 minutes before transferring them to a wire rack. Cool completely before decorating to prevent the icing from melting. Store in an airtight container to maintain freshness.
Decorating Sugar Cookie Cutouts
Creative Icing Ideas
Decorate sugar cookie cutouts with vibrant icing designs to enhance their visual appeal. Royal icing dries hard, making it perfect for intricate patterns. Separate it into small bowls to create individual colors with food coloring. Flooding involves filling cookie surfaces with a thin layer of icing, while piping adds detailed lines. For softer finishes, consider buttercream icing. Frost cookies with an offset spatula or pipe it on for decorative effects.
Innovative Decoration Tips
Incorporate unique elements for stand-out cookies. Use edible glitter for sparkle, sprinkle colored sugar for texture, or add small candies for dimension. Create stencils with parchment paper for precise shapes, then dust powdered sugar or cocoa for a professional touch. For a rustic look, press lightly into dough with textured objects like forks or stamps before baking. Avoid over-decorating by choosing a focal point and balancing colors and textures.
Storing and Serving Suggestions
Best Practices for Freshness
Store sugar cookie cutouts in an airtight container at room temperature to maintain freshness. Place a piece of parchment paper between layers to prevent sticking. You can keep cookies fresh for up to two weeks this way. For longer storage, freeze undecorated cookies for up to three months by placing them in a freezer-safe container or zip-top bag. Ensure cookies have cooled completely before storing to avoid moisture buildup.
Presentation Ideas
Arrange sugar cookie cutouts on a decorative platter to elevate their presentation. Use festive plates, tiered trays, or cookie jars matching the event’s theme. For added appeal, group cookies by shapes and colors. Add small bowls of decorative sprinkles or edible glitter nearby for a fun, interactive serving station. Placing cookies in clear cellophane bags tied with matching ribbons can also create charming party favors.
Conclusion
Sugar cookie cutouts are more than just a delicious treat; they’re a cherished tradition with deep roots and endless creative possibilities. Whether you’re baking for a holiday gathering or simply indulging your artistic side, these cookies offer a perfect canvas for your imagination. By following the right techniques and using quality ingredients, you can create beautiful and tasty masterpieces that will impress everyone. Remember to store them properly to maintain their freshness and consider unique presentation ideas to make your cookies stand out. Happy baking!