Chocolate Cutout Cookies: Recipe, Decorating Tips & Storage Guide
These cookies stand out due to their perfect balance of texture, flavor, and shape retention. Unlike standard cookies that may spread or lose definition, chocolate cutout cookies maintain sharp edges and intricate designs. Their rich chocolate flavor makes them a delightful treat for various occasions, such as holidays or birthdays.
The Role of Chocolate Quality in Flavor
High-quality chocolate profoundly impacts the taste of your cookies. Using premium cocoa powder ensures a deep, rich flavor that standard powders can’t match. Dark chocolate varieties, like 70% cocoa, enhance the complexity of the cookies, creating a more satisfying and indulgent experience for you and your guests.
Key Ingredients for the Ultimate Chocolate Cutout Cookies
Choosing the Right Chocolate
High-quality chocolate provides a rich, complex flavor for your cookies. Opt for premium cocoa powder and dark chocolate with at least 70% cocoa content. These choices elevate the taste and give your cookies a deeper chocolate profile. Avoid using sweetened chocolate, as it can alter the balance of flavors. Instead, choose unsweetened or low-sugar varieties to maintain control over the sweetness level in your recipe.
Importance of Fresh Ingredients
Fresh ingredients enhance the taste and texture of your cookies. Use fresh, room-temperature eggs to help the dough bind properly and achieve the desired consistency. Fresh butter, instead of margarine or shortening, imparts a richer flavor and better mouthfeel. Additionally, ensure that your flour is not expired, as aged flour can impact the quality of the dough and the overall texture of the cookies. Fresh baking powder or baking soda is crucial for leavening and achieving the perfect rise.
By opting for these quality components, you can ensure your cookies not only taste excellent but also retain their intricate designs.
Step-by-Step Guide to Making Chocolate Cutout Cookies
Preparing the Dough
Mix ingredients in a large bowl to create a balanced dough. Use 2 cups of all-purpose flour, 1/2 cup of premium cocoa powder, and a pinch of salt for the dry mix. Beat 1 cup of softened butter and 1 cup of sugar until creamy in a separate bowl, then incorporate 2 room-temperature eggs and 1 teaspoon of vanilla extract. Combine wet and dry ingredients gradually to avoid lumps, forming a smooth dough. Divide the dough into two portions, wrap each in plastic wrap, and chill in the refrigerator for at least one hour to ensure it firms up.
Baking and Cooling Tips
Preheat your oven to 350°F (177°C) during dough chilling. Roll out the dough to about 1/4 inch thickness on a floured surface, then use cookie cutters to shape your cookies. Arrange the cutouts on a parchment-lined baking sheet, ensuring 1-inch spacing between cookies for even baking. Bake for 8-10 minutes, monitoring closely to prevent overbaking. Let cookies cool on the baking sheet for 5 minutes before transferring to a wire rack to cool completely, ensuring that they retain their shape and texture.
Decorating Ideas for Chocolate Cutout Cookies
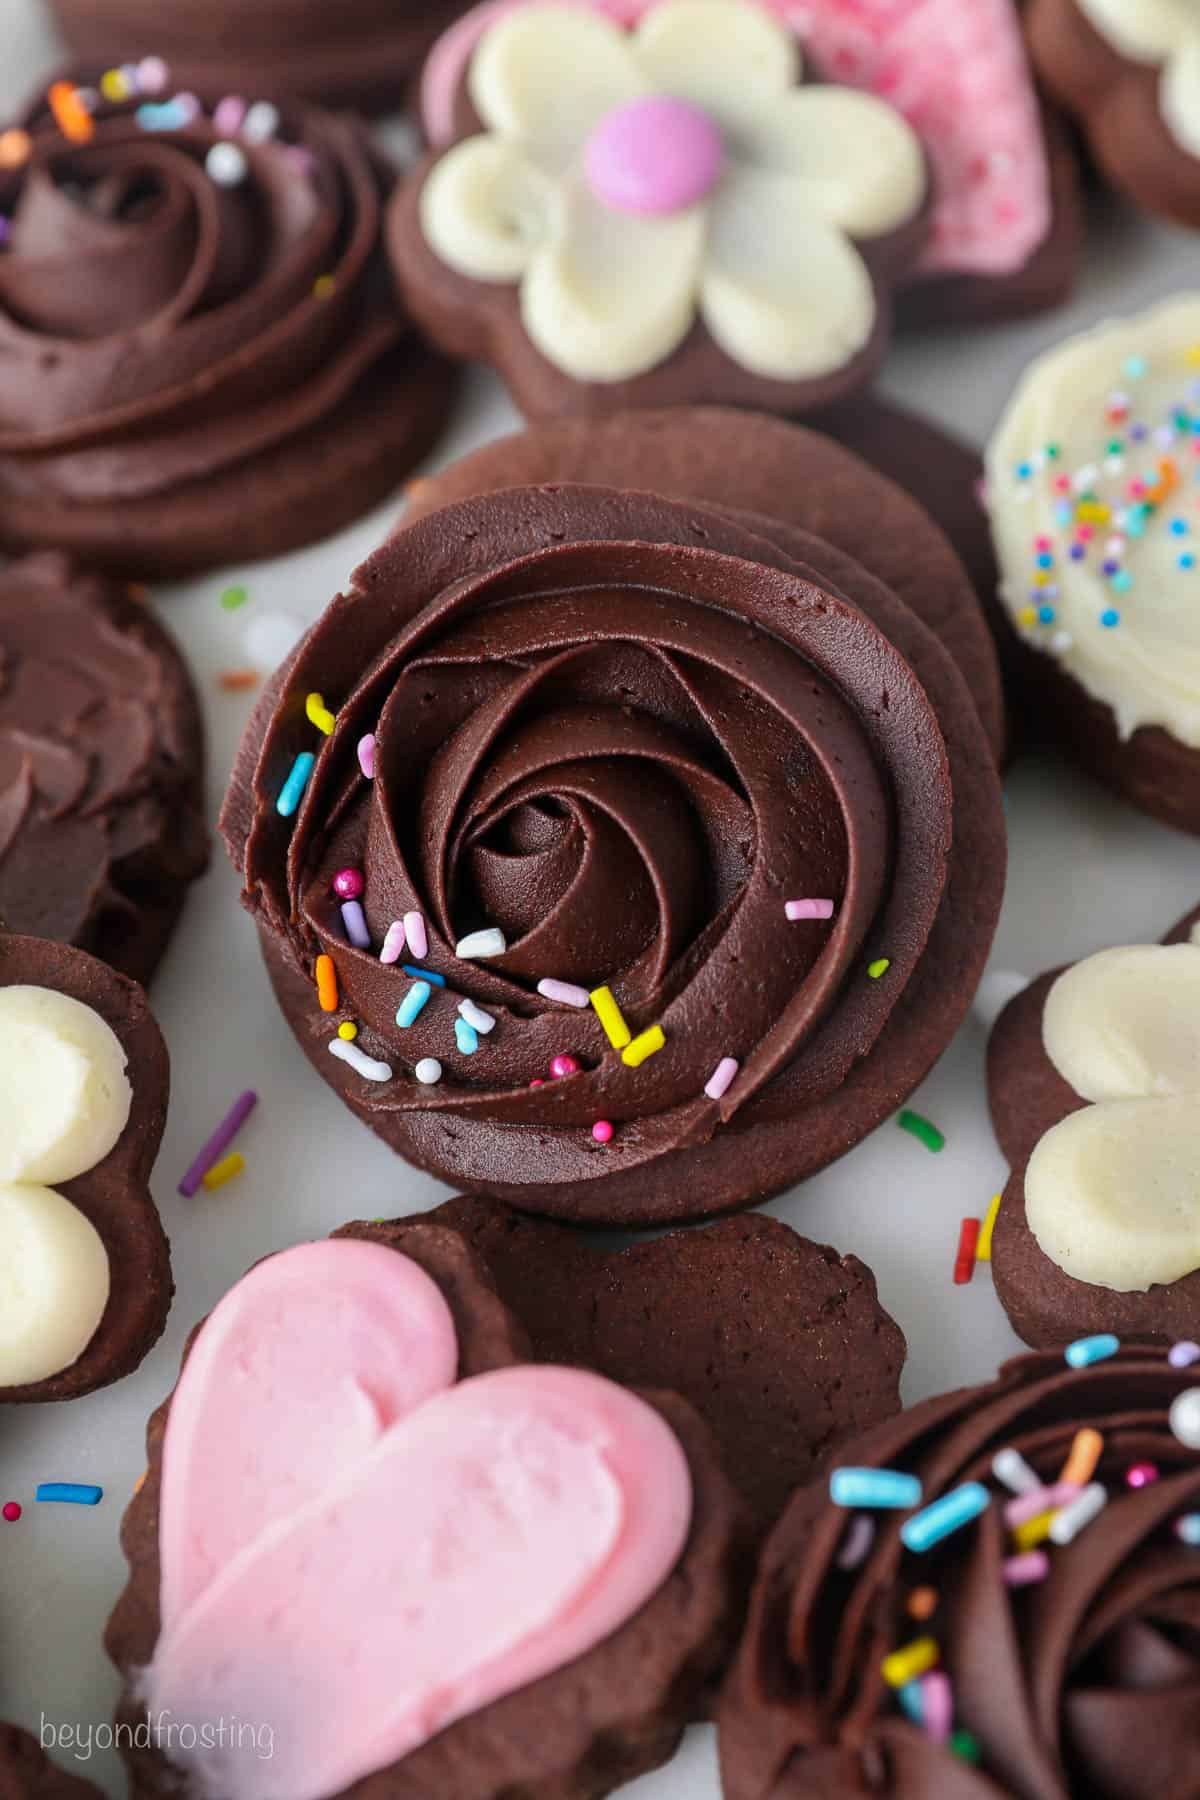
Creative Icing Techniques
Use diverse icing techniques to enhance your chocolate cutout cookies‘ visual appeal. Royal icing, a popular choice, dries hard and allows for detailed designs. You can create intricate patterns using piping bags with various tips.
Flooding is another effective method. Outline the cookie’s shape with a thick icing border, then fill the interior with a thinner consistency. Add dots or lines while the icing is wet for a marbled effect. For best results, let the icing dry completely before adding additional layers to prevent blending.
Glazing offers a simpler yet elegant look. A mix of powdered sugar and milk creates a glossy finish. Dip the cookies or apply with a brush. Consider using food color to match themes or occasions.
Using Edible Decorations
Apply edible decorations to make your cookies even more festive. Colored sugars add a sparkly texture and can be sprinkled over wet icing for adherence. Nonpareils, the small round sprinkles, provide a playful touch.
Chocolate transfers allow intricate designs without advanced piping skills. Place the transfer on warm icing to embed the design. Use edible glitter to add a touch of luxury for special occasions.
Consider adding edible flowers for a floral aesthetic. Gently press them into the icing before it sets. Use metallic edible paints for an elegant finish on shapes like stars or moons.
Storage and Preservation Tips
Best Practices for Freshness
Store chocolate cutout cookies in an airtight container to maintain freshness. Keep cookies at room temperature in a cool, dry place. If layering cookies, separate each layer with parchment paper to prevent sticking. Consume within one week for optimal taste and texture.
Long-Term Storage Solutions
Freeze cookies for long-term preservation. Place cookies in a single layer on a baking sheet to freeze before transferring to an airtight container or freezer bag. Remove excess air to prevent freezer burn. Label the container with the date and type of cookies. Store up to three months. Thaw cookies at room temperature before serving.
Conclusion
Creating the best ever chocolate cutout cookies is an art that combines quality ingredients and meticulous preparation. By following the detailed guide provided, you’ll achieve cookies with perfect shape and texture every time. Decorating these cookies becomes a fun and creative process with techniques like royal icing and edible decorations. Proper storage ensures your cookies remain fresh and delicious, whether you’re enjoying them immediately or saving them for later. With these tips and tricks, your chocolate cutout cookies will not only taste amazing but also look stunning for any occasion.